MySQL Workbench
This page explains how to use MySQL Workbench to manage a Digital Archive database.
MySQL Workbench is a tool that lets database administrators and developers visually manage a MySQL or MariaDB database. As an alternative, you can use phpMyAdmin, but MySQL Workbench is more powerful and easier to use in many situations.
AvantLogic uses MySQL Workbench Community edition 8.0.18. Version 8.0.19 would not load.
Open a database
- Run MySQL Workbench
- On the home page, click the box with the name of the Digital Archive installation
- Ignore a
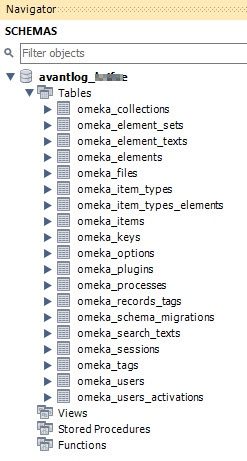
Connection Warningif it displays - The database should appear at left under the
Schemastab of the navigator - Click the triangle icons to expand/contract the database, its tables, and table columns
If you can't connect, or you get a Cannot Connect to Database Server error, you may need
to allow remote access to the database as explained in the following section. This can
happen if your IP address changed since your last successful connection.
Allow remote access to a database
For security reasons, a web host will not allow remote connections to a database unless you explicitly grant access from the remote source. Follow these steps to allow MySQL Workbench to remotely access a database.
- Get the IP address of the computer on which use MySQL Workbench
- In a browser window type
myipaddressin the address bar - Your IP address will appear, or there will be links to sites that will show the address
- In a browser window type
- Go to cPanel
- In the
DATABASESsection, clickRemote MySQL- In the
Add Access Hostssection, paste the IP address in the Host field - Click the
Add Hostbutton
- In the
- If your IP address ever changes, you'll need to perform these steps again
Add a database connection
Before you can work with a database using MySQL Workbench, you need to add a connection to the database to your MySQL Workbench installation. Follow these steps to add a database connection.
Add a new connection
- Allow remote access to the database as explained in the previous section.
- Run MySQL Workbench
- Choose
Database>Manage Connectionsfrom the top menu - Click the
Newbutton at the bottom of theManage Server Connectionsdialog - Set:
- Connection Name: the site name
Examples:mydomain.netormysubdomain.mydomain.net - Connection Method:
Standard (TCP/IP) - Hostname: same as the Connection Name
- Port:
3306 - Username: the database username e.g.
swhpl_omeka
- Connection Name: the site name
- Click
Store in Vaultto set the password. On the popup dialog:- Enter the database password in the Password field
- Click the
OKbutton
- Click
Test Connectionto verify the credentials.- Ignore a
Connection Warningfor incompatible/nonstandard server version. It will display if the database is MariaDB instead of MySQL. - Click the
Continue Anywaybutton
- Ignore a
- Click the
OKbutton on theSuccessfully made the MySQL connectiondialog - Click the
Closebutton at lower right - Quit MySQL Workbench to work around a bug where new connections don't open
- Run MySQL Workbench again
- Open the database to verify that you can connect to it
Copy a database to use on another server
Follow these steps to copy a production database to use for testing on a local development server.
Export SQL database
- In WHM, open the cPanel for the account
- In cPanel, choose
phpMyAdmin - Truncate the session table in the left panel
- Click
omeka_sessionstable - Click Operations in the top menu
- In the Delete data or table section (very bottom), click
Empty the table (TRUNCATE) - Click OK on the confirm dialog
- Click
- Export SQL
- Click the database name in the left panel
- Click Export in the top menu
- Keep the
Quickexport method and theSQLformat - Click the Go button
- Save the file on the local computer
- Upload the file to the server if it will be imported to a database there
Create a new database
- Go to cPanel account for the database e.g. daus
- In cPanel, open the MySQL Databases tool
- Create a new database
- Add a user to the database
- Give the database all privileges
Import SQL into an existing database using the command line
- Go to cPanel account for the database e.g. daus
- Open a Terminal window
- CD to the folder containing the .sql file
mysql -u root -p db_name < exported.sql- When prompted, type the root password for the database
To get the root password:
- Run WHM as root
- Open a WHM Terminal window (not a cPanel Terminal window)
- Type
cat /root/.my.cnf
Example: mysql -u root -p daus_swhpl < swhpl.sql
Import SQL into new local development database
- Go to phpAdmin on localhost
- Run the Laragon Control Panel
- Click the Database button
- Click the
phpMyAdminlink in the top menu
- Create a new DB with today's date in the name
- Click
Newin the left panel - Type a database name
- Choose
utf8mb4_unicode_cifor the character set - Click the Create button
- Click
- Import the data
- Run MySQL Workbench for localhost
- Double click on the name of the new database
- Choose
File > Open SQL Script - Locate the exported SQL file and click the Open button
- Click the lightening bolt icon to import the SQL
- Click the refresh icon in the Navigator panel to see the tables
Use the database on localhost
- Edit
db.inito use the new database- Make a copy of the localhost settings
- Comment out the original settings
- Keep the
host,username,password, andcharsetsettings for localhost - Change
dbnameto match the new database and make sureprefixis set toomeka_unless SWHPL in which case it'somek_. - Manually run Omeka on localhost (DO NOT RUN FROM PhpStorm)
- Go to
http://localhost/omeka/admin/users/login - Login as a user for the imported database
- Go to the Appearance page and click the Navigation tab
- Change the URL for the
Landingpage to behttp://localhost/omeka/find?query= - Click the Save Changes button
- Set the Homepage back to the Landing page and save again
- Change the URL for the
- On the AvantElasticsearch plugin config page change Contributor Id to
deva(ordevb)
- Go to
- Go to the Elasticsearch Indexing page:
- Export all items
- Import into new local
devb(ordevb) - Import into new existing shared
devshr
- Get latest files from the server (just ones added/changed since date of last DB)
- Go to the
public_html/digitalarchive/filesfolder for the site being imported - Compress the folder into a zip file
- Download the zip file into
C:\laragon\www\omeka - Delete the zip file from the server
- Rename
C:\laragon\www\omeka\filesto e.g.files-swhpl - Extract or move the
filesfolder from the zip file to become the newfilesfolder (the zip may contain afilesfolder nested in afilesfolder - do the right thing). Extracting a very large zip file can take a long time. - Delete the zip file
- Go to the
- You should now be able to use the imported site normally on localhost